Understanding the Foundation of Safe Arterial Cannulation
Behind every successful arterial line insertion lies a solid understanding of anatomy and site selection. These aren’t just academic concepts—they’re critical to patient safety, procedural success, and long-term outcomes. Whether you’re at the start of your practice or refining your technique, mastering the anatomical landscape is essential.
The Structure of Arteries: More Than Just Tubes
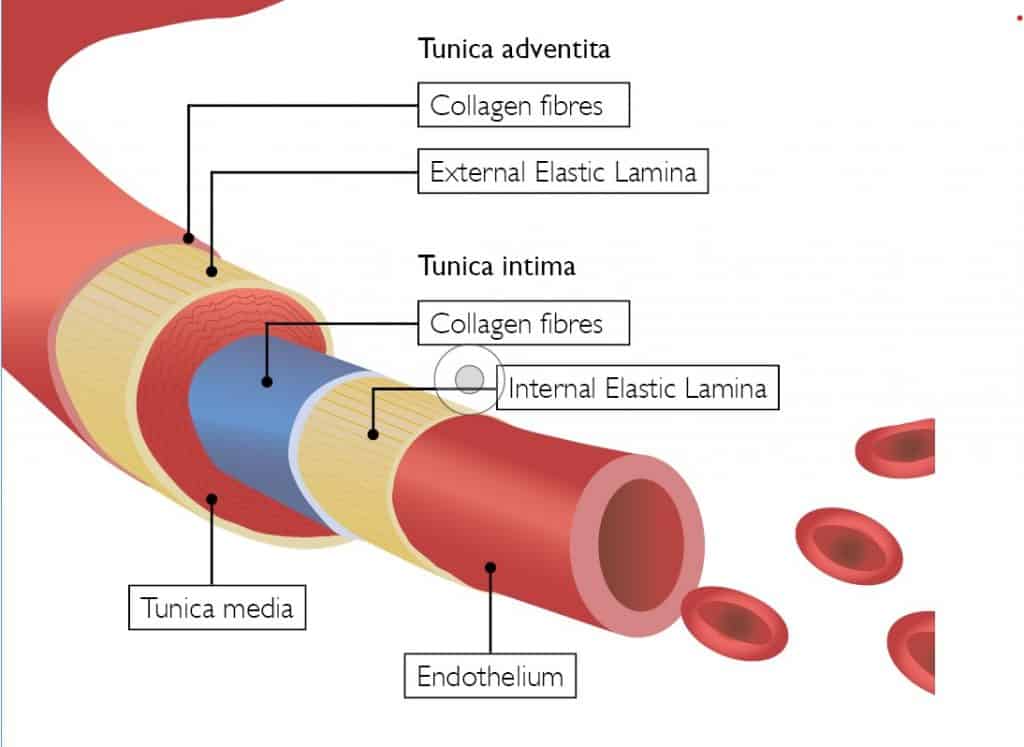
Arteries are composed of three distinct layers, each with a specific function and clinical relevance:
- Tunica Intima – The innermost layer, made of smooth endothelial cells. It facilitates blood flow and prevents the formation of blood clots. Trauma to this layer during cannulation can trigger platelet adhesion and thrombus formation.
- Tunica Media – The middle layer, rich in smooth muscle and elastic fibres. It allows the artery to constrict and dilate. This layer is often responsible for vasospasm during attempts at cannulation.
- Tunica Adventitia – The outermost layer, composed of connective tissue and nerve fibres. It provides structural support and protection.
Understanding these layers helps clinicians minimise trauma during insertion and reduce complications like thrombosis or arterial spasm.
Choosing the Right Site: A Strategic Decision
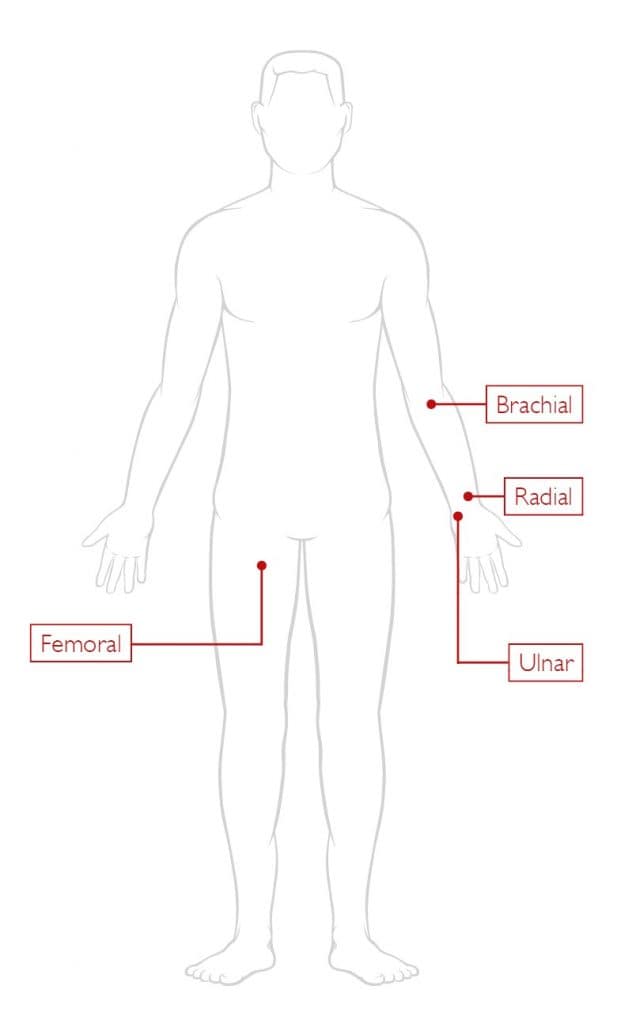
Not all arteries are created equal when it comes to cannulation. Here’s a breakdown of the most commonly used sites:
✅ Radial Artery – The Gold Standard
- Why it’s preferred: Superficial, easily palpable, and has strong collateral circulation via the ulnar artery.
- Best for: Most adult patients in ICU or theatre settings.
- Tip: Always perform an Allen’s test to confirm adequate ulnar flow before cannulation.
⚠️ Ulnar Artery – Use with Caution
- Historically avoided due to difficulty in palpation and higher complication rates.
- Now viable with ultrasound guidance, especially in patients with ulnar dominance.
⚠️ Brachial Artery – Larger but Riskier
- Easier to cannulate due to size, but lacks collateral circulation.
- Risk: Occlusion can lead to significant limb ischemia.
⚠️ Femoral Artery – Last Resort
- Useful in emergencies or when peripheral access fails.
- Risks: Higher infection rates and potential for catheter fracture if patient positioning is poor.
The Role of Ultrasound for Arterial Line Placement
Ultrasound guidance is increasingly becoming the standard of care for arterial line placement. It improves first-attempt success rates, reduces the number of punctures, and minimises complications.
- Transverse view: Shows the artery as a round structure—ideal for identifying location.
- Longitudinal view: Allows real-time visualisation of the needle entering the vessel.
Key Principles
- Basic Physics: High-frequency sound waves reflect off tissues and are converted into real-time images.
- Probe Use: Proper orientation and positioning are essential. Transverse views show vessels as circles; longitudinal views show them as lines.
- Frequency Selection: Use high-frequency probes for superficial vessels to maximise resolution.
Ultrasound not only improves procedural success but also enhances patient safety when used with proper training and technique.
Conclusion
Anatomy and site selection are not just the first steps—they’re the foundation of safe and effective arterial cannulation. By understanding the structure of arteries and choosing the right site with purpose and intent, clinicians can reduce complications and improve outcomes.