
Recommendations of Dr Diane Weber
Two years ago, I met Alicia, a breast cancer patient. After struggling with the disease for a while, she had to undergo a mastectomy. Soon after her surgery, a need for a chest port was identified. She came to me asking for an aesthetically pleasing result.
“I have already went through a mastectomy”, she said, “I do not want a big scar that will remind me of chemotherapy later”.
So how can we achieve a skillful and aesthetical chest port placement?
To answer this question, we will explain how to place chest ports using the jugular then the subclavian vein.
Chest port placement using the jugular approach
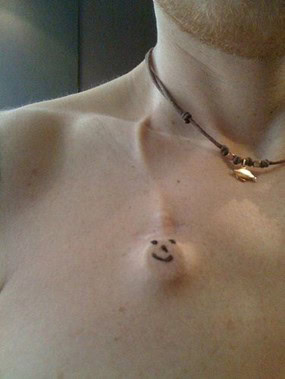
Picture 1: A highly visible port – Source: http://lecrabedelyly.over-blog.com/port-a-cath-vs-picc-line.html

Picture 2: A catheter nearly protruding the skin – Source: Diane Weber
Achieving skillful and aesthetical chest port placements using the jugular vein can be done through one effective approach. When puncturing the jugular vein, there will be the need to tunnel the catheter subcutaneously to arrive on the chest wall in the area beneath the clavicular bone. Right after it, the catheter can be connected to the port, and the latter can be positioned in the same way as we would do in a subclavian vein access.
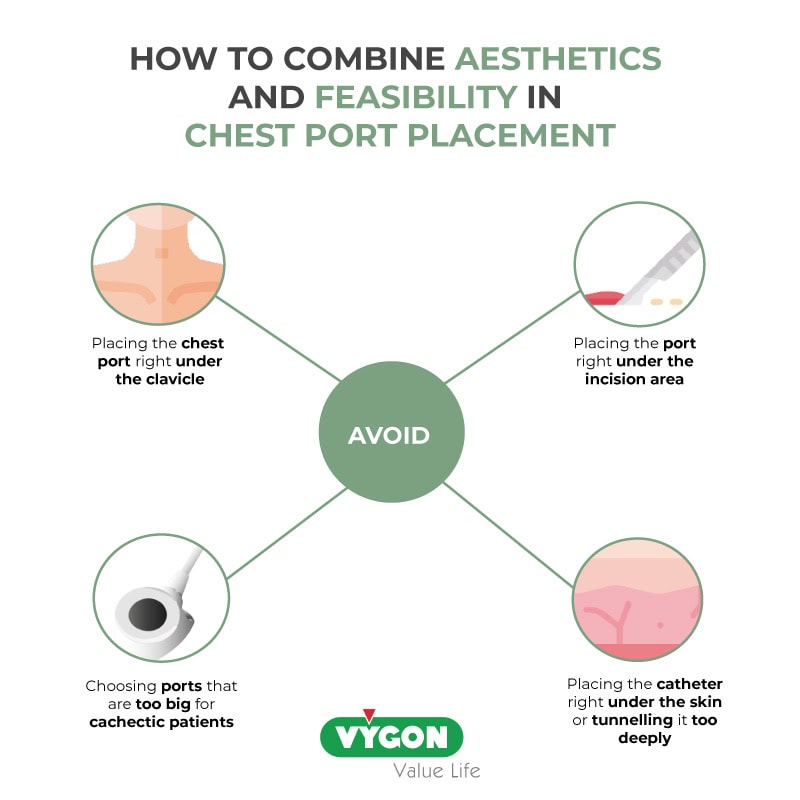
The port should be positioned as laterally and as distally to the puncture site as possible. It is particularly important for the jugular vein approach since a placement of the port right under the clavicle should be avoided. In fact, continuous friction of the port against the clavicle can be uncomfortable or even painful for the patient. Also, it is important to keep in mind that a port should not be under the incision area.
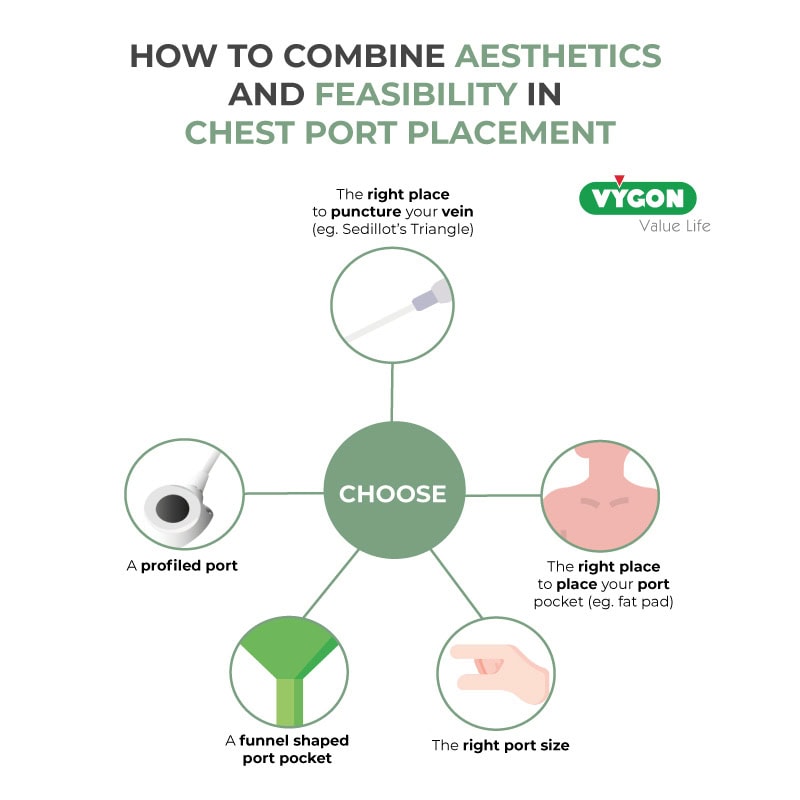
In my opinion, in “average-sized” patients there is the need to aim while choosing the place to dissect your port pocket, for the little fat pad (picture 3). The latter is found cranio-medially to the axillary pit and medially to the anterior axillary fold. It can be easily obtained by placing the skin incision for the port pocket parallel to the axis of the humerus inside of the deltopectoral groove. This groove is easily palpable medially to the humerus head.
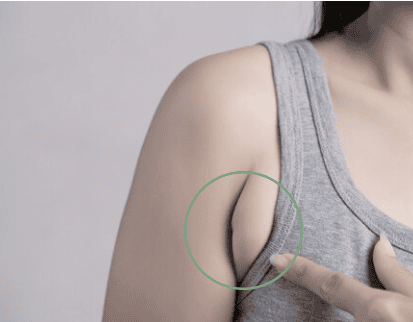
Picture 3: Fat Pad – Source: https://www.doctorsophie.com/excess-axillary-tissue
In the specific case of obese patients, I advise not going for the axillary fat pad. Here, the incision parallel to the deltopectoral groove can be aimed higher, with a port pocket angled at approximately 45° towards the patients’ feet – while still avoiding placement right under the clavicle.
For very skinny or cachectic patients using the jugular approach, the length of tunneling might be too long and the catheter too visible. If the patient is too skinny, I would advise considering using a PICC-port.
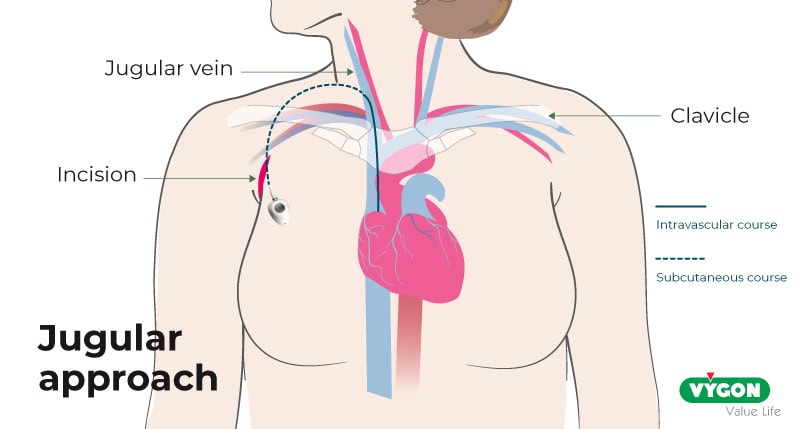
Picture 4: Jugular approach for chest port placement
The illustration above shows how to localize the puncture site using surface landmarks. The patient is lying in a supine position. The clavicle and the fat pad are illustrated. A line is made perpendicular to the deltopectoral groove; this will be your incision line. The port is then pushed into the fat pad.
When tunneling the catheter, attention should be paid to the depth of tunneling to avoid catheter visibility or even as shown in picture 2, subsequent catheter protrusion.
I recommend bending the steel tunneler about 60° at its front end which makes it easier to create a subcutaneous tunnel from the port pocket using the tunneler over the clavicle. The catheter should neither be right under the skin nor be tunneled too deeply since it can cause pain. You will also have a hard time pushing your steel tunneler.
One additional tip is to insist on one maneuver that is quite important for the good functioning of ports: once you have punctured the jugular vein and done an incision next to your guidewire, make sure to widen the space underneath the skin of your incision. It can be done with a mosquito clamp to avoid catheter kinking.
Chest port placement using the subclavian approach
In the subclavian approach, the ultrasound probe is positioned at the proximal end of the anterior axillary fold that is parallel to the deltopectoral groove. The subclavian vein is then punctured from here. The incision is made distally from your puncture needle along the fold and will subsequently be made invisible by the fold. The catheter will be “tunneled” from the superficial skin incision to the deep subclavian vein puncture site.
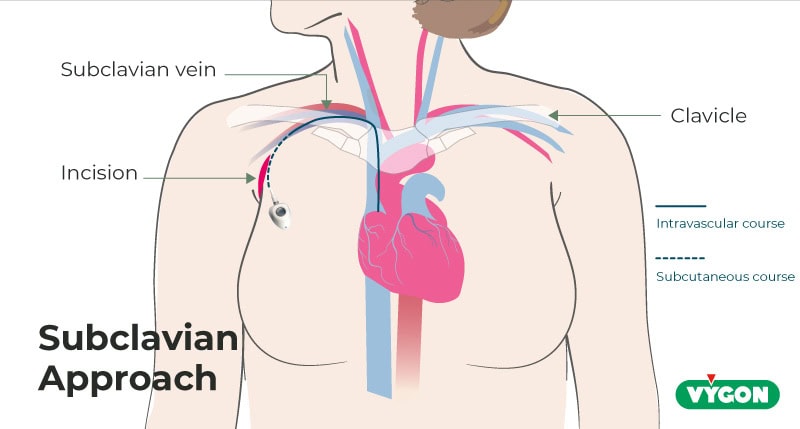
Picture 5: Subclavian chest port and catheter placement
The port pocket is then dissected medially from the incision in a triangular shape, the apex of the triangle aiming medio-distally. This way, when pushing the port into the triangle, there is no need to fix your port by suture as it will be fixed in place naturally by the triangular shape of the pocket. Consequently, there will be no need for a big skin incision and a big scar as you don’t need to reach far to fix your port in place.
The pocket depth is chosen according to patient’s corpulence. In rather obese patients, don’t aim too deep since access to the port by Huber needle might become challenging. In cachectic patients you should dissect your pocket a little deeper to be able to hide it and avoid protrusion over time.

Picture 6: Cross section illustration of port placement choosing the right pocket depth
In the pictures below, you will see images of two port placements using the subclavian approach. The full line is for the subcutaneous course while the cut line is for the intravascular one.
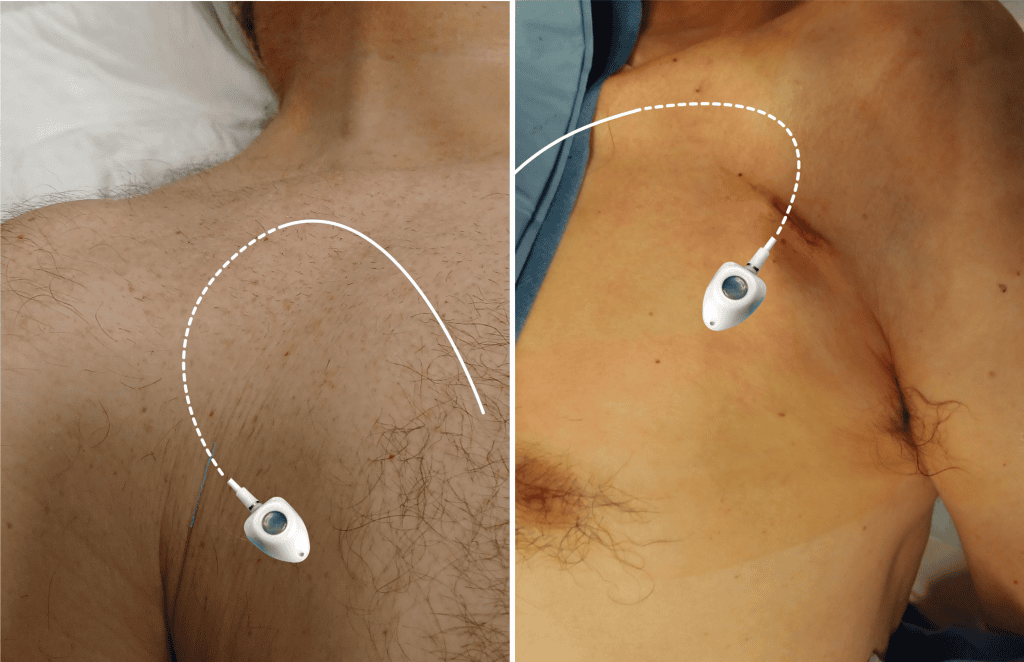
Picture 7: Right and left side subclavian puncture
By paying attention to these details, I think it is possible, particularly in lean patients, to make the port and the scar invisible. These techniques can help us avoid stigmatizing our cancer patients and improve their quality of life.
Moreover, there is a wide range of ports on the market: choose the right size for the right patient. Keep in mind that when you choose your size, the port should be easily accessible with a Huber needle. This is especially important with plus-size patients. Don’t choose ports that are too big for cachectic patient as they may lead to skin erosion.
Finally, using profiled ports instead of round ports allow smaller skin incisions and scars as they glide easily into the incision and its pocket.
Conclusion:
Surgeon, head of the vascular access department at the Paoli-Calmettes oncology centre in Marseille.